File Submission
Consider this fact – Roughly half of all files sent to the printer cannot be output as expected. The reasons run the gamut from missing fonts and images to the use of incompatible software.
These problems can be avoided but it demands that printing be factored into the creative process from the earliest planning stage. We will discuss this at length throughout this chapter.
Acceptable File Formats

A printing service bureau can accept various formats. However, in order to avoid file handling charges, it is best to deliver a format that is print-ready, such as an Indesign, PDF or Quark Xpress document.
If you submit just an Illustrator or Photoshop file, then your printer will have to manually import these files into Indesign / Quark. Delivering the proper formats from the start will speed up production and avoid file handling charges.
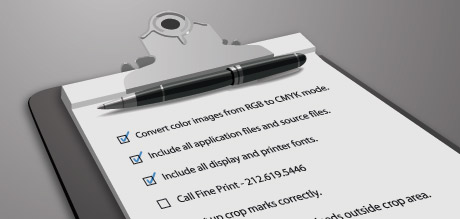
Preflight Checklist
Once a layout is complete and ready to be printed, it is good practice to run it through this list to ensure that there are no errors and the design prints as expected.
Naming Files
In order to keep yourself organized (and your printer happy) try to follow this rough guideline for file naming.
- All your files should live in one folder
- Name the folder after yourself, the company or the client
- Inside that folder create another folder and name it after the product and size (ie: Postcard 5×7)
Collect for Output
Both Quark and Indesign are equipped with this function, which automatically collects all the images, fonts and files associated with your print project and then neatly packs them into a folder.
Make sure that your package is complete and all your files are clearly labeled and marked to avoid any mistakes.
Crops, Bleeds and Live Area are set
 This should be done when you first set up your document, as explained in the last chapter
When in doubt about how a well-prepared document should look, you can always take a peek at our templates later in this chapter.
All Images are Included
 The easiest way to include all of the linked images and fonts with your project is to collect files for output. The program will create a new folder with all the necessary resources.
- Indesign: go to File > Package
- Quark: go to File > Collect for Output
All Fonts are Included
NOTE: It is wise to keep a backup copy of your file with live text in case any changes need to be made. Be sure to save this copy before creating outlines, otherwise you won’t be able to edit the text.
Color Modes are set properly.
 The default mode for most applications is RGB, so it’s important to make sure this is set properly.
- Photoshop go to Image > Mode > CMYK
- Gimp does not support CMYK. You must download and install this plugin
- Illustrator go to File > Document Color Mode > CMYK
- Freehand Filter > Colors > Convert to CMYK
Resolution is set properly
 As we have already discussed, resolution should be set to at least 350 PPI at the actual size. You must also make sure that you don’t just add PPI to a low-resolution image. The original must be hi-res in order to get the necessary clarity and detail, so make sure you shoot/scan your artwork with this in mind.
In both Photoshop and GIMP you can go to Image / Image Size to adjust your resolution.
File Delivery
There are several methods for handing your project over to your printer.
Compression Tools
It is considered a best practice to compress files before submitting them online. Not only does it protect your files from corruption, but your upload time will be greatly reduced.
If you are using Mac OS X, then you already have Zipit installed. Simply select the files or folders you want to compress, right-mouse-click (or control-click if you have one button) on them and from the popup menu, select Create archive of “file”
NOTE: By default, creating an archive of multiple files will result in a file called “Archive.zip”. Be sure to rename this file, labeling it correctly for the printer.
This is probably the most common method of file delivery. It is fast and convenient, although in many cases there are limitations on how much data you can send. In general, anything bigger than 10MB should probably not be sent via email.
Consult your mail hosting service for accurate file limits.
Browsers
Some printers will provide an online application you can access with your web browser in order to upload your files. Fine Print, for example provides such a service. If your printer does not provide this, there are free services available, such as YouSendIt or Mega Upload.
FTP Software
FTP applications are similar to web-based uploads, except instead of a browse you use specialized software which uses a standard File Transfer Protocol. This allows you to drag files from your computer directly to a password protected server.
Hardware Delivery
With the convenience of internet transfers, this method is becoming less popular. Howvere it is still best suited for projects that are unusually large (many gigabytes) and would take far too long to upload. Two of the most common methods are:
- Burn A CD with the project files (documents, fonts and images included) and send via mail.
- Save the Project to a small portable storage device (ie: Pen Drive) and hand it over directly.